About Popups
Popups can be very effective tools for connecting visitors on your site to your mailing list. You can also use them to show ads, social icons, or even great free offers from your site.
These popups can be linked to various elements on your page or simply display on certain URLs of your site. Regardless, popups are one of the best and highest converting methods of building your email list and persuading visitors to “opt-in” to your emails.
Once someone signs up through one of your popups and “opts-in” you can now deliver them special offers, updates to your product/service, your latest blog posts, etc. This is a great way to drive traffic to your site, increase engagement, increase brand awareness, and communicate with your visitors for whatever you like.
Why Trigger Popups on Click?
Wouldn’t it be great if you had more control over when and how your popups appeared to your visitors?
Popup Fire allows you to show popups based on visitor actions like exit intent and scroll percentage.
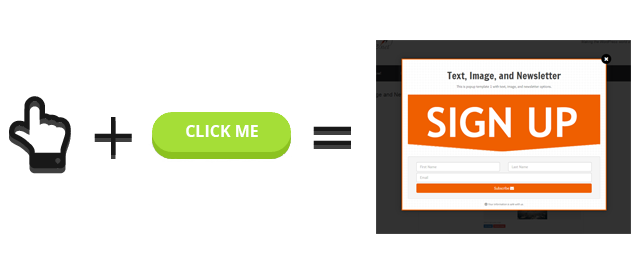
But, wouldn’t it be even better if you could trigger a popup when a visitor interacts with a certain part of your page, like clicking a button?
This way, you can deliver a very targeted popup directly to visitors that have already chosen to click on a specific button. If you have a great CTA this should yield a very high conversion rate and non-intrusive way to connect with specific visitors. The benefits and positive potential of this targeted popup are obvious.
Want to know how to enable this type of feature on your Popup Fire plugin? Take a look at the next section to find out.
How to Trigger Popup Fire on Clicks
Luckily, triggering your popups to display on clicks is a simple process.
- Click Edit on the popup you’d like to trigger with a button click
- Go to Conditions
- Go to When
- In the section labeled Trigger, find the sentence labeled Custom Button
- In the sentence starting with “Add the class…” copy the text in quotes. It should say something like wps-pf-custom-button-11. (The number at the end will change depending on the popup you choose)
- In the WordPress dashboard open the post or page you’d like to include a Button Triggered Popup
- In the Editor, select Text in the top-right corner to bring up the HTML
- Find the <button> tag for the button you’d like to have trigger the popup
- Add class=”” inside the <button> tag (if it isn’t there already)
- Paste the text you copied from step 5 between the quotes
- Update your page and go back to the Visual editor to make sure no mistakes are made
- Done.
Steps 1 – 3
Choosing the Popup and Menu Selection
We are going to start with the Popup itself.
First, choose which popup you’d like to appear when a visitor clicks a particular button and click Edit for that particular Popup.
Once the Edit Popup screen appears, click Conditions in the sidebar menu and make sure you in the When menu.
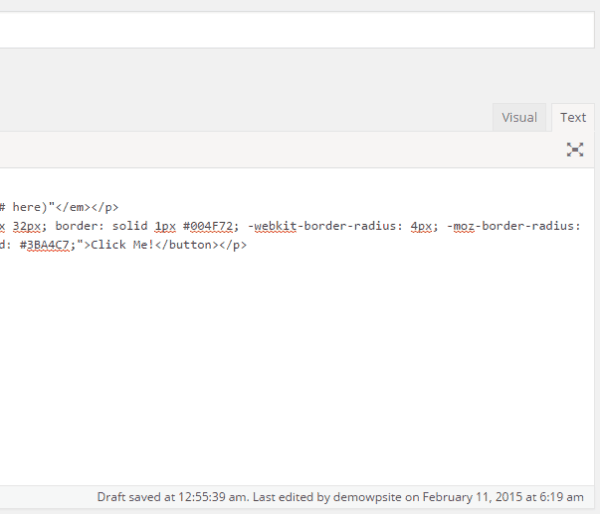
Steps 4 – 5
Locating the Custom Button Section and Copying the Class Name
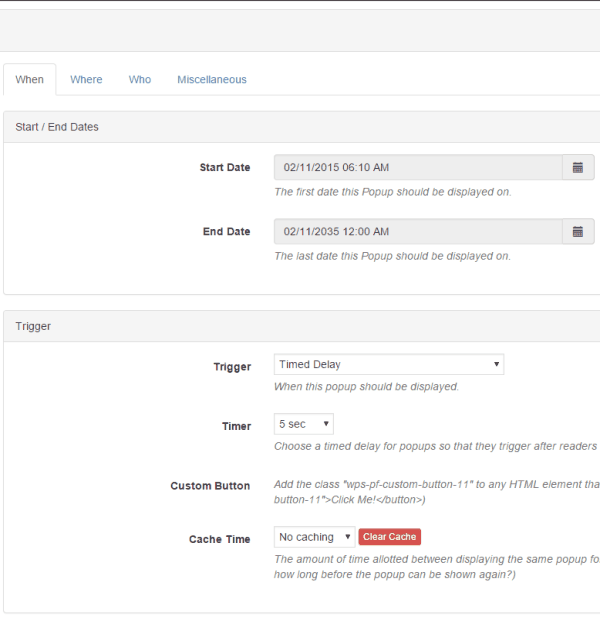
Now that you’re in the correct menu, find the Trigger section and look for the sentence labeled Custom Button.
The sentence in this section should start with “Add the class…” Copy the text that is between the quotes. This is the class name and how the Popup will determine which element will be its trigger.
You’ll notice a number at the end of this text. In this case, it is 11. This number will change depending on the Popup you choose.
But don’t worry, the correct number will be automatically displayed in this section for each Popup.
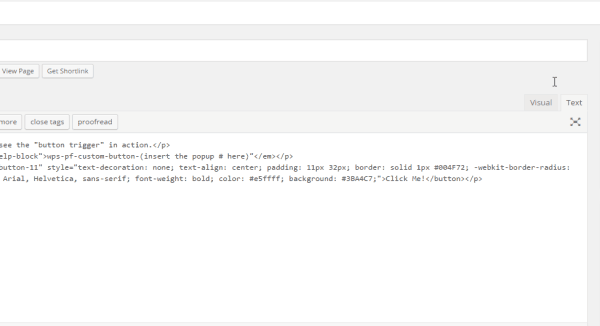
Steps 6 – 7
Choosing the Post/Page and Opening the Text Editor
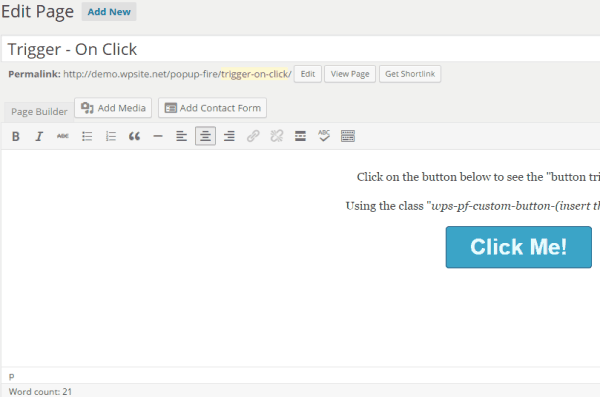
Now that you have the correct class name copied, find the Post or Page you want your Button Popup to be displayed on.
Go other to the Text editor in the top-right to display the HTML for that particular Post or Page.
Steps 8 – 10
Finding the Button Tag and Adding the Class Name
With the text editor open, find the <button> element for the button you wish to link your Popup to. If there is no class selector in the <button> element already, add this – class=””
Between the quotes, paste the class name you copied from Step 5.
Step 11
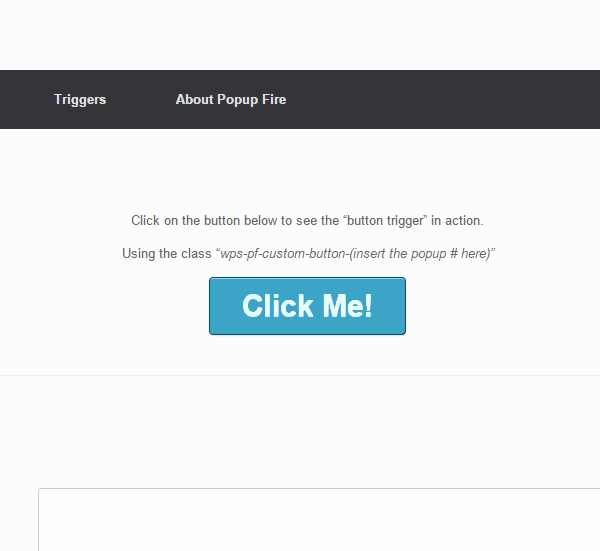
Updating the Page/Post and checking your work
Switch back to the Visual editor to make sure everything appears the same as it did before. This is just to make sure you didn’t accidentally edit any HTML you didn’t intend to.
Be sure to hit UPDATE otherwise your edits won’t be saved and your Popup won’t display correctly.
Done! Check Your Popup
Conclusion
There you have it. If you followed the steps correctly, you will have a great Popup that displays when a visitor clicks a button on your site!
Visit CodeCanyon if you’d like to Purchase Popup Fire.
While there, check out Our Portfolio to see the other great plugins we’ve made!
Check out our Demo of Popup Fire if you would like to learn more about all the great features it includes.