UPDATE: Google’s UI has changed. Click the link here for a more updated version of how to setup Google Analytics.
You got a website and need to track visitors. With so many tools out there, you might be confused about which one is right for you. Well let’s save some time and setup the industry standard. Google Analytics is the world’s most used and most trusted visitors tracking system. This tutorial will help you to set it up for your site in 5 minutes.
You will require to just copy paste some lines of code to the footer of your website for activating Analytics. So let’s start it!
Step 1: If you don’t have a Google / Gmail account, Sign up for it.
Google Analytics will require you to have a Google account before you get started. If you are using any of the services like GMail, orkut, or any other Google services, you can use your account credentials here in Analytics.
Step 2: Login at the Analytics page with your Gmail account. Click on Access Analytics button.
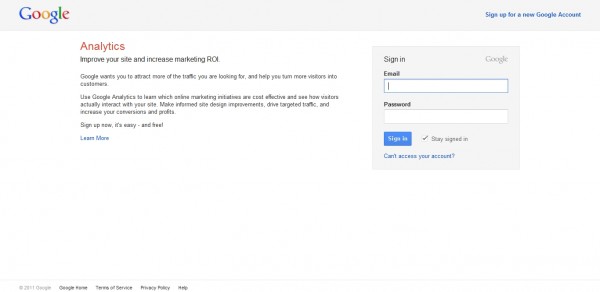
To access analytics data for your website, you will require to login to the analytics page.
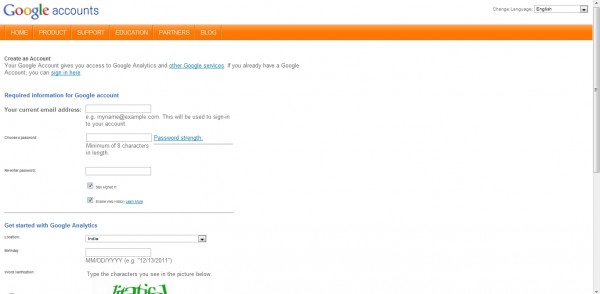
Step 3: Sign up for Google Analytics after logging in to your account. Accept the user agreement and click on “Create New Account >>”
Here in the signup form, fill in your details like name, phone number, etc.
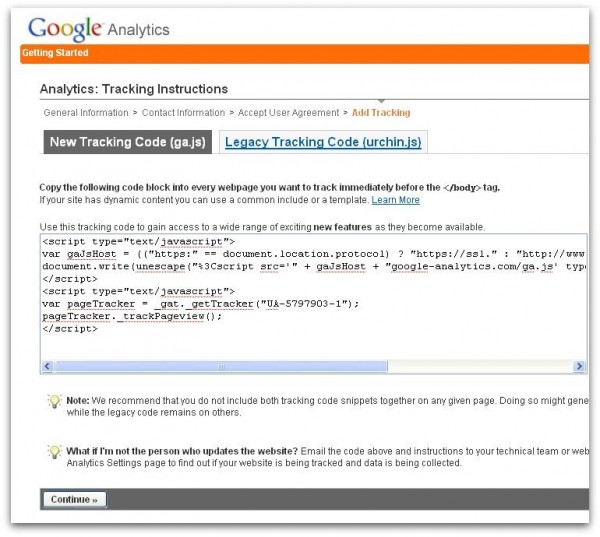
Step 4: Get the tracking code.
Now you will get the code in two files: the new tracking code file [ga.js] and the Legacy Tracking code [urchin.js]. Just save them on your hard drive.
Step 5: Make your website ready for Google Analytics
Open your website’s root directory in Dreamweaver. You should see all the files and folders in the Files tab of the explorer. Get to the file called ‘footer.php’ in the ‘includes’ folder. You need to paste the java script code you just discovered in the step 4 to the ‘footer.php’ file. Find the </body> tag and paste the analytics code just before it. Refer to the following image for a clear idea.
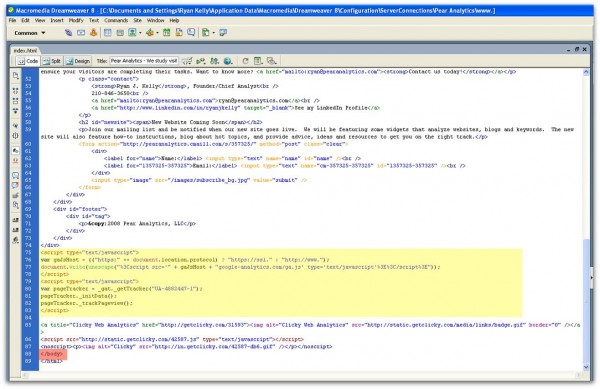
When you place the code in footer.php file, it means that every page of your website will include that footer file and indirectly, the Google analytics code.
Step 6: Test your site!
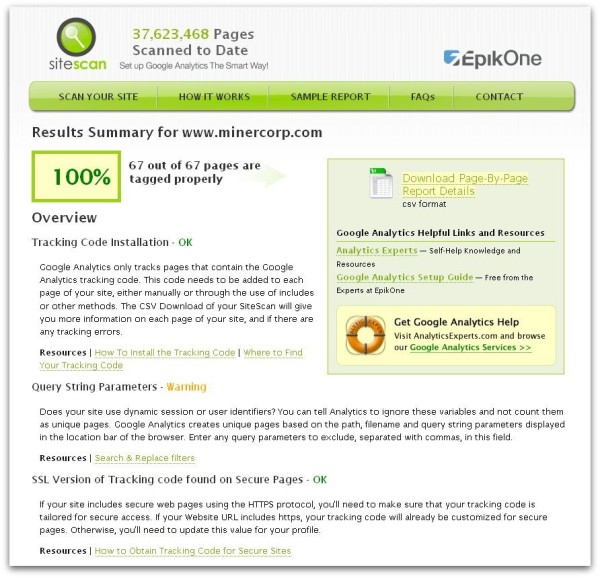
Ok you are almost done with the installation. Now it’s the time to check if this works or not. Go to site scan website and place your website’s URL and your email address on the home page. Here you can set the type of javascript you want to search for. Put it to automatic detect if you are not sure with the type. Start the scan and you will see a report similar to the following image:
 Now that you are done with setting up Google Analytics for your website, the next steps are to setup goals and filters. Hope you enjoy a better tracking system for your site.
One thought on “How to Setup Google Analytics”